

Integrating Contact Form 7 with Mailchimp allows you to automatically add or update subscribers whenever a user submits your WordPress contact form. Using the Contact Form To Any API plugin, you can connect your form directly to Mailchimp without writing any code.
Follow the step-by-step guide below to set up the integration quickly and accurately.
Watch the Video Tutorial
Prefer a visual walkthrough? Watch this quick YouTube tutorial to see how to connect Contact Form 7 with Mailchimp using Any API, including API key setup, request headers, and field mapping inside WordPress.
👉 Watch the full tutorial here:
Step 1: Log in to Your Mailchimp Account
Start by signing in to your Mailchimp account. You’ll need access to your account settings to generate an API key, which is required to authenticate the connection.
Step 2: Access the Integration Settings in WordPress
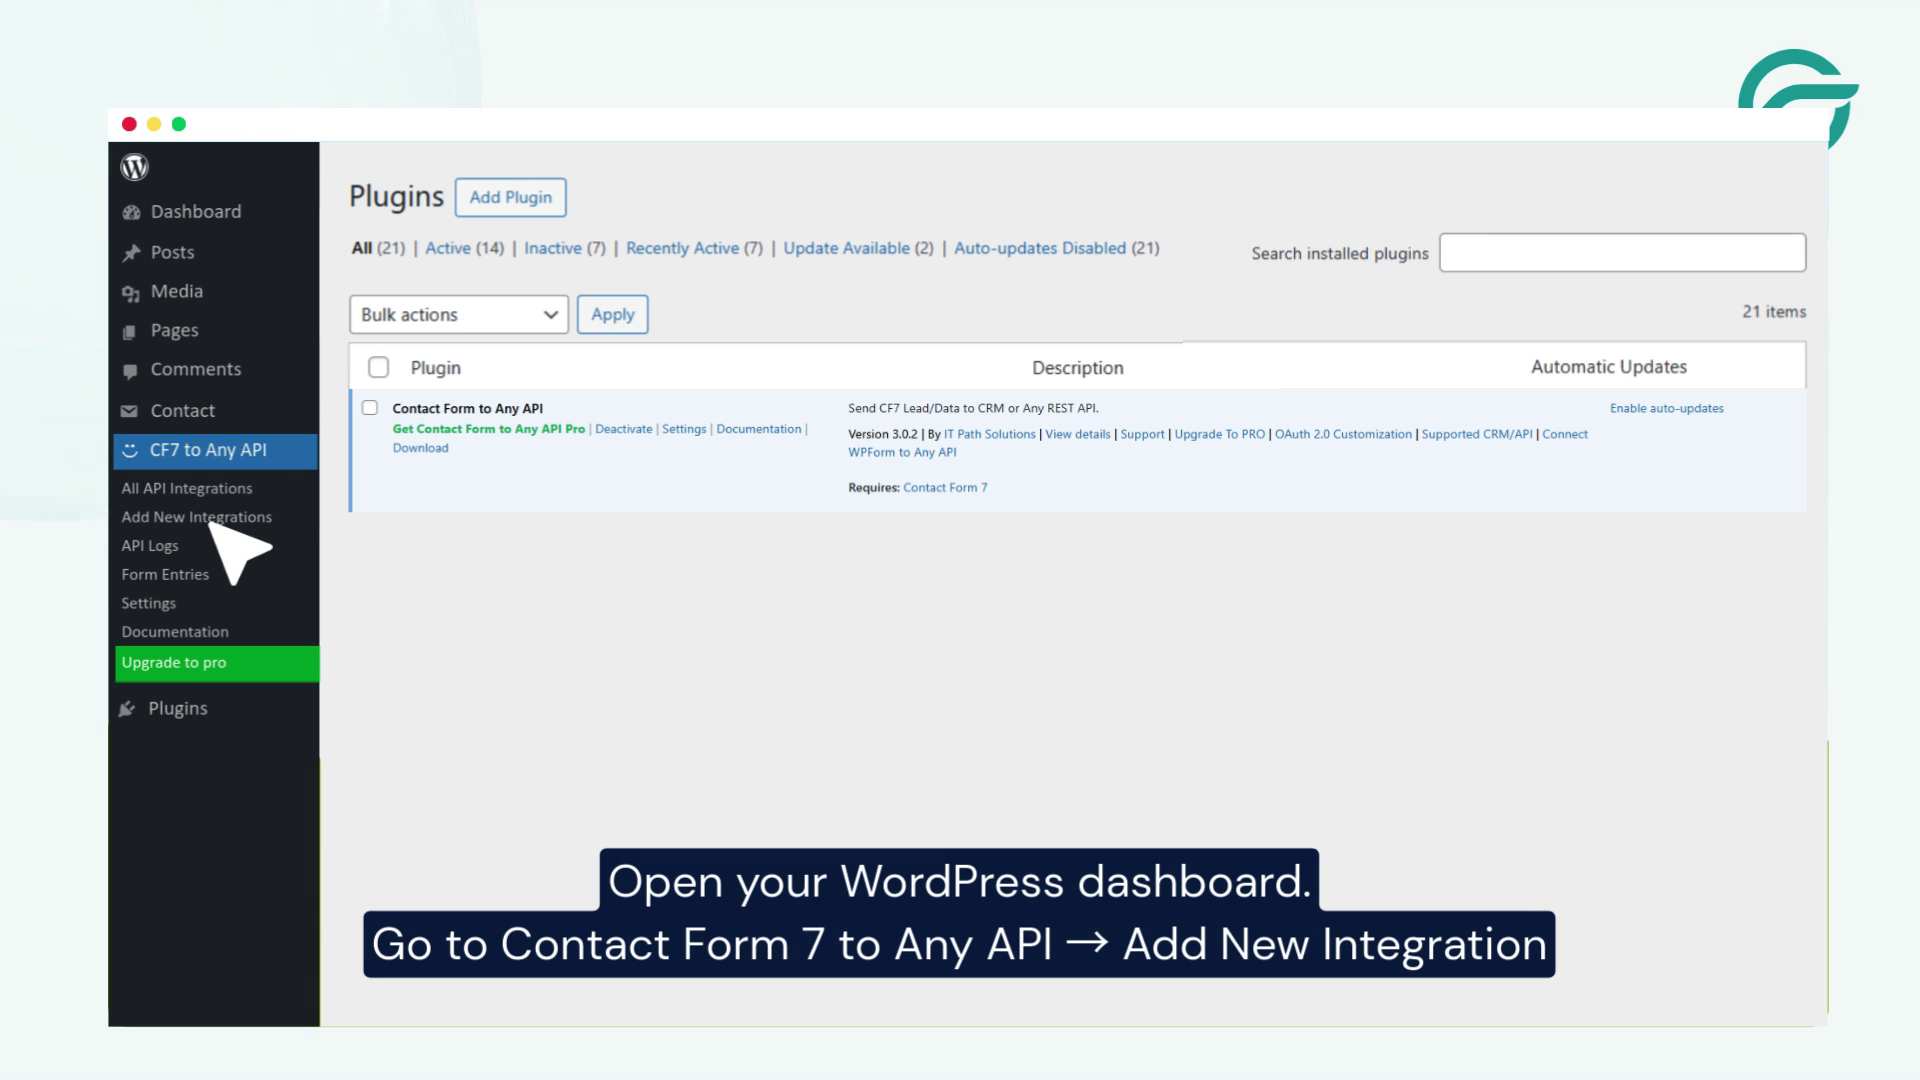
Next, open your WordPress dashboard.
- Navigate to CF7 to Any API
- Click on Add New Integration
This is where you’ll configure the connection between your contact form and Mailchimp.
Step 3: Create a New Mailchimp Integration
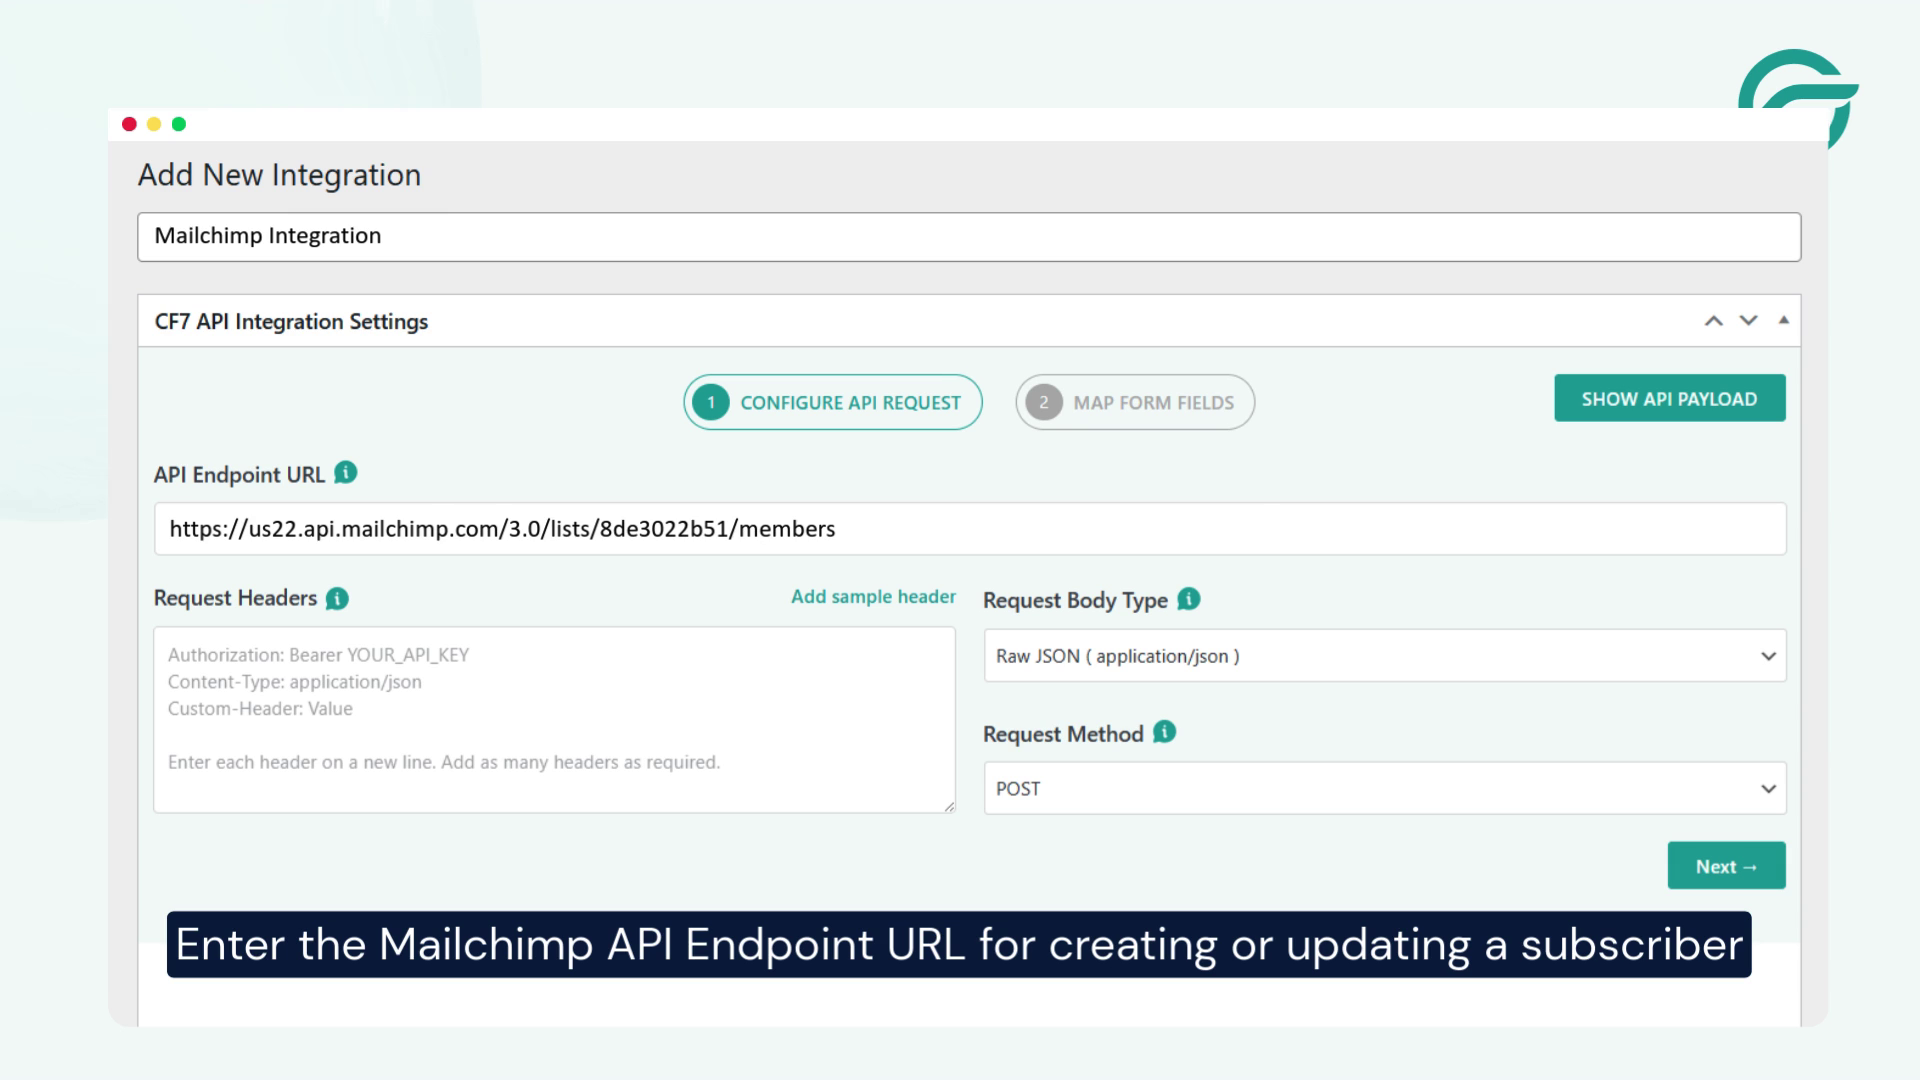
In the integration setup screen:
- Give your integration a clear and descriptive title
(Example: Mailchimp Integration) - Enter the Mailchimp API Endpoint URL used to create or update a subscriber in your audience list
This endpoint ensures that form submissions are sent directly to Mailchimp.
Step 4: Add Mailchimp Authorization Headers
To securely connect with Mailchimp, you need to add request headers.
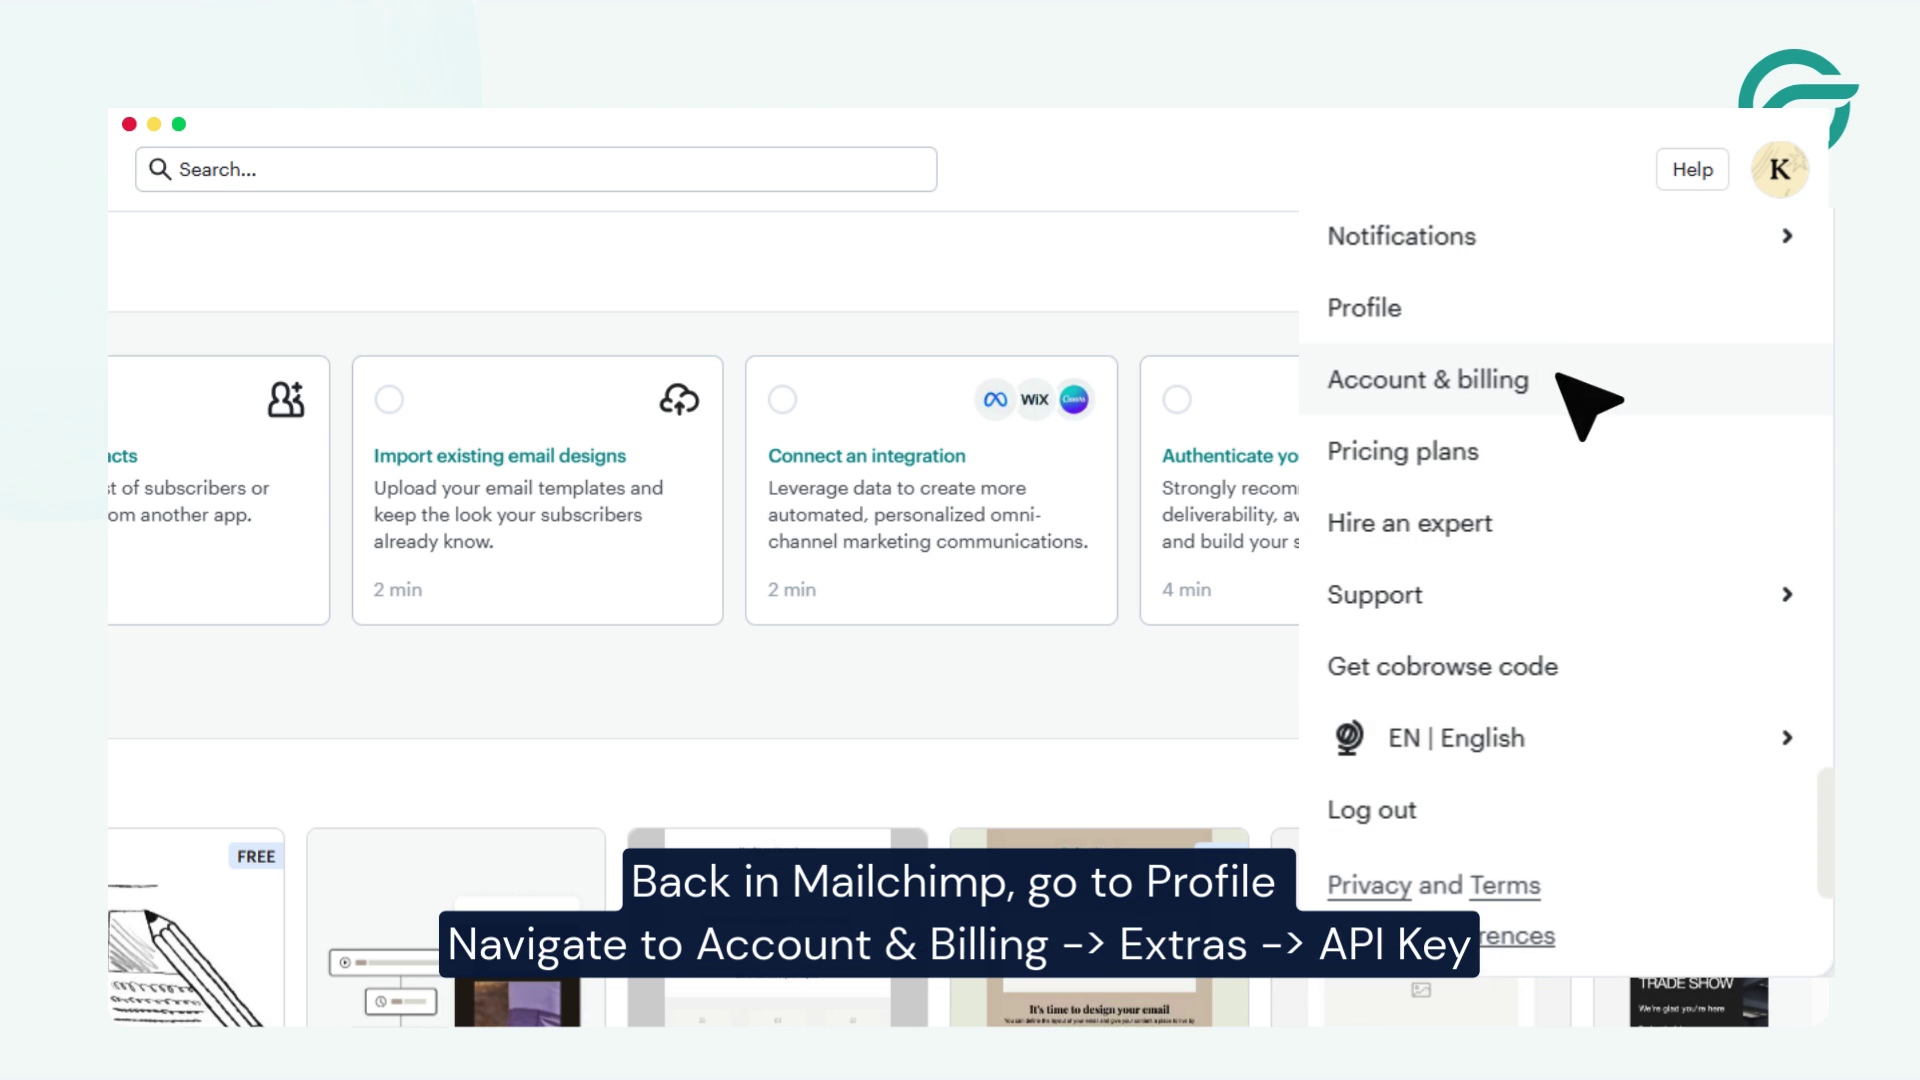
Generate a Mailchimp API Key
In your Mailchimp account:
- Go to Profile → Account & Billing
- Navigate to Extras → API Keys
- Click Create A Key, give it a name, and copy the Key Value
Configure Request Headers in WordPress
Back in the integration settings, add the following headers:
- Authorization: Your Mailchimp API Key
- Content-Type: application/json
These headers allow WordPress to authenticate and communicate with Mailchimp properly.
Step 5: Select the Contact Form
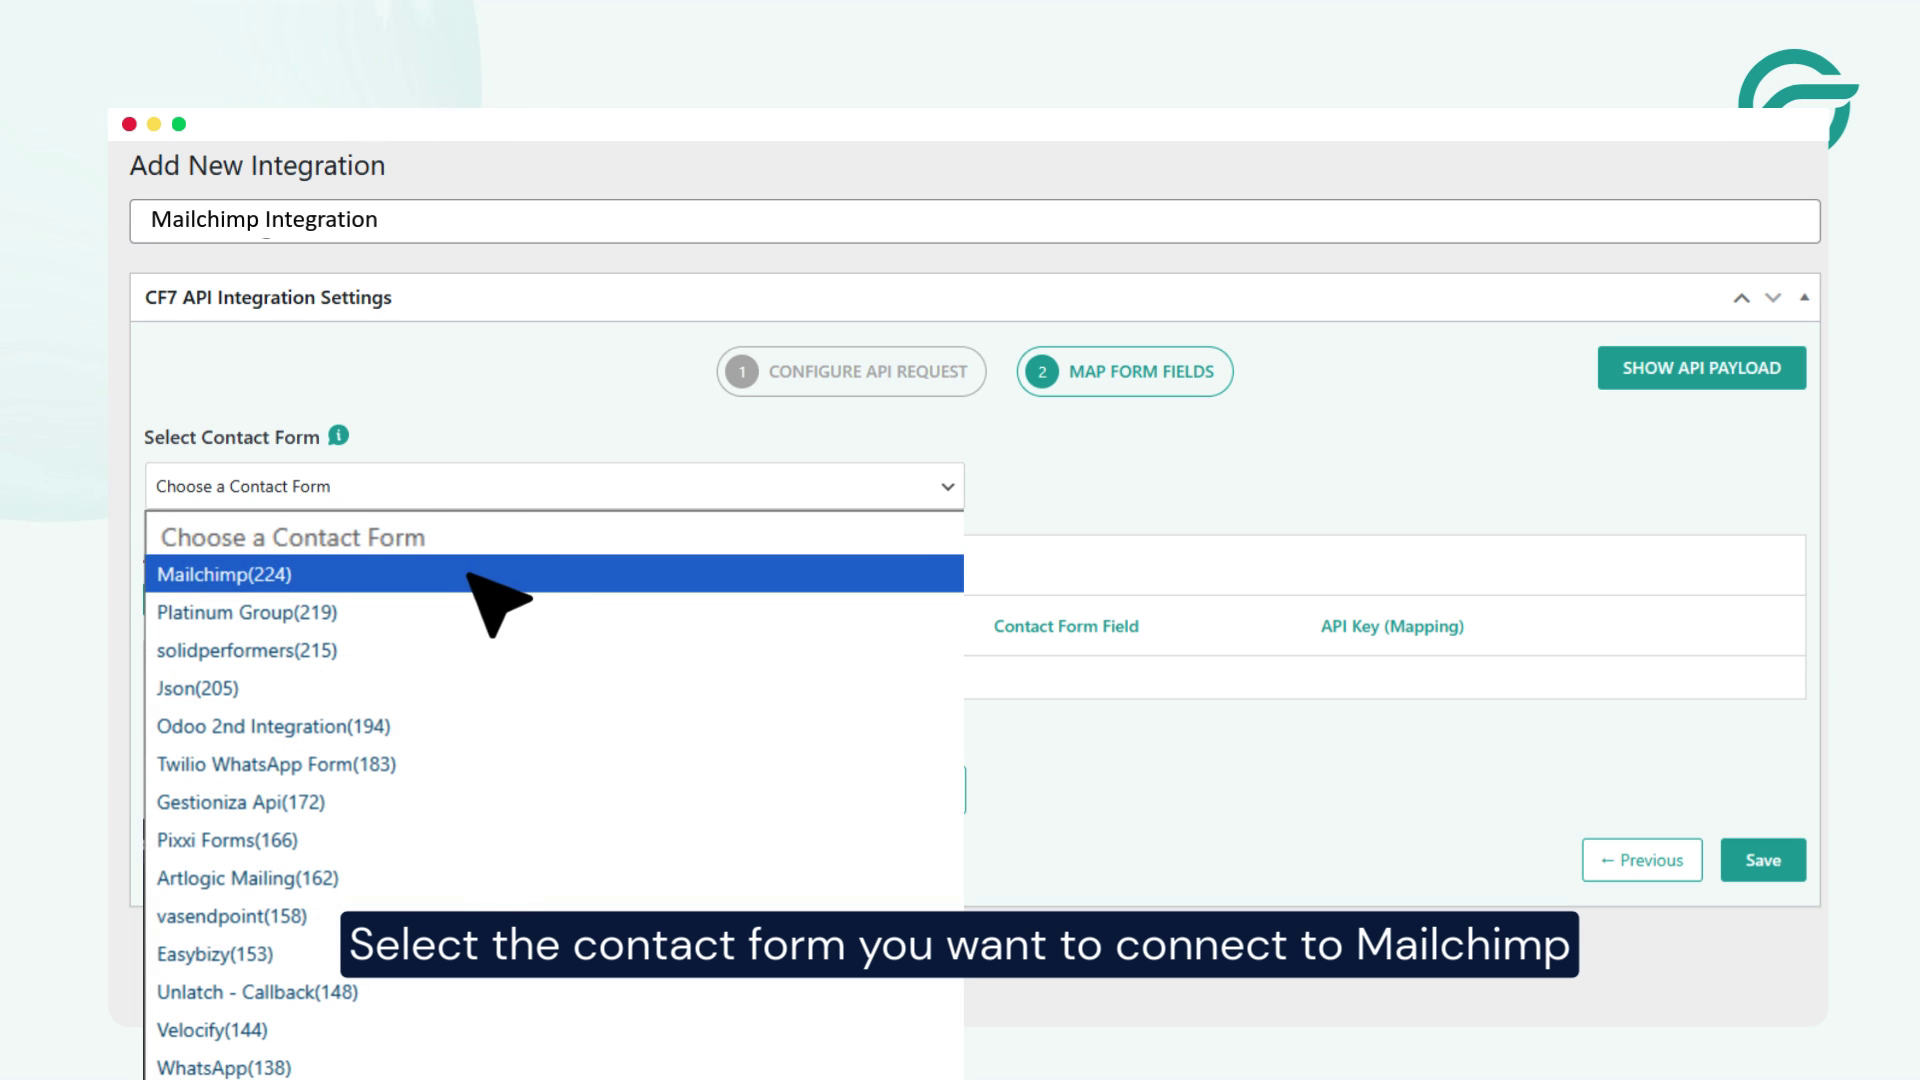
Choose the Contact Form 7 form you want to connect with Mailchimp. This ensures that only submissions from the selected form are sent to your Mailchimp audience.
Step 6: Map Mailchimp Fields with Form Fields
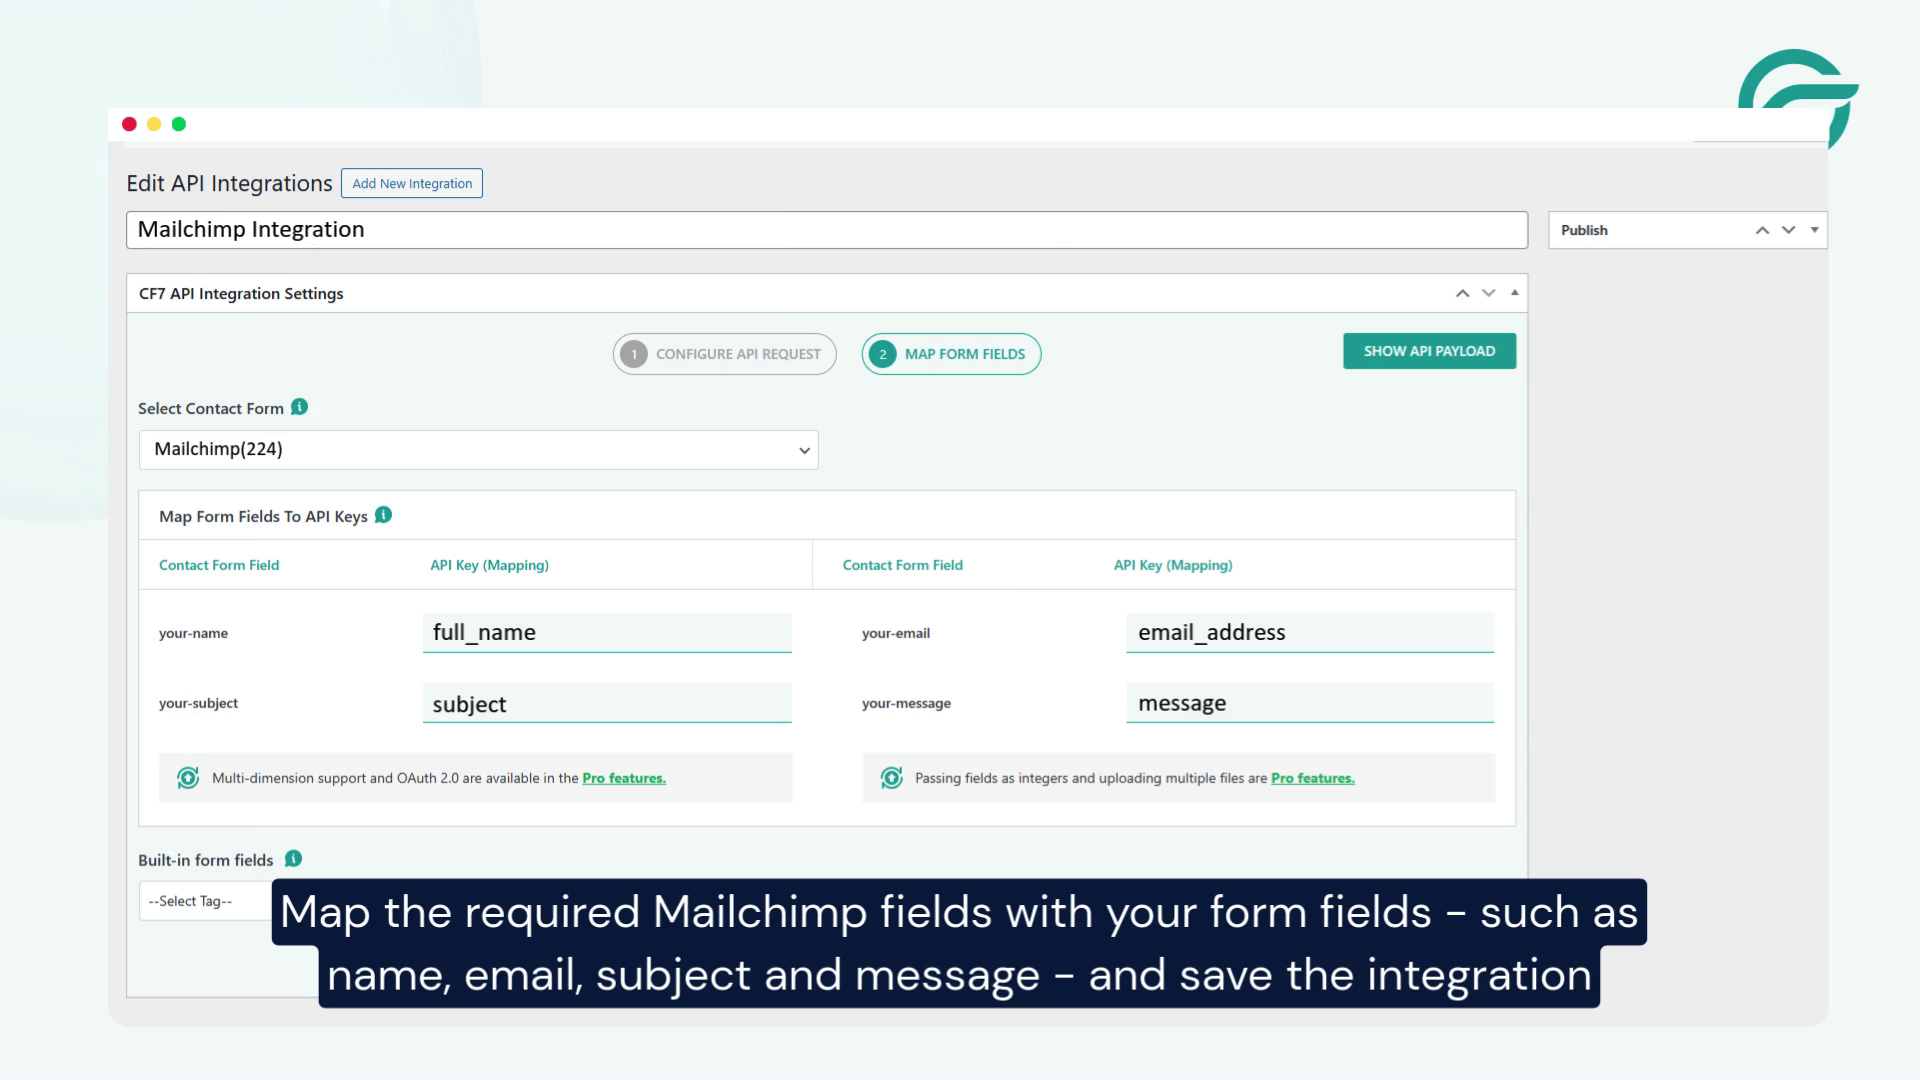
Now, map your form fields to the corresponding Mailchimp fields.
Common field mappings include:
- Email address
- Name
- Subject
- Message
Accurate field mapping ensures that subscriber data is stored correctly in Mailchimp. Once done, save the integration.
Step 7: Test and Verify the Integration
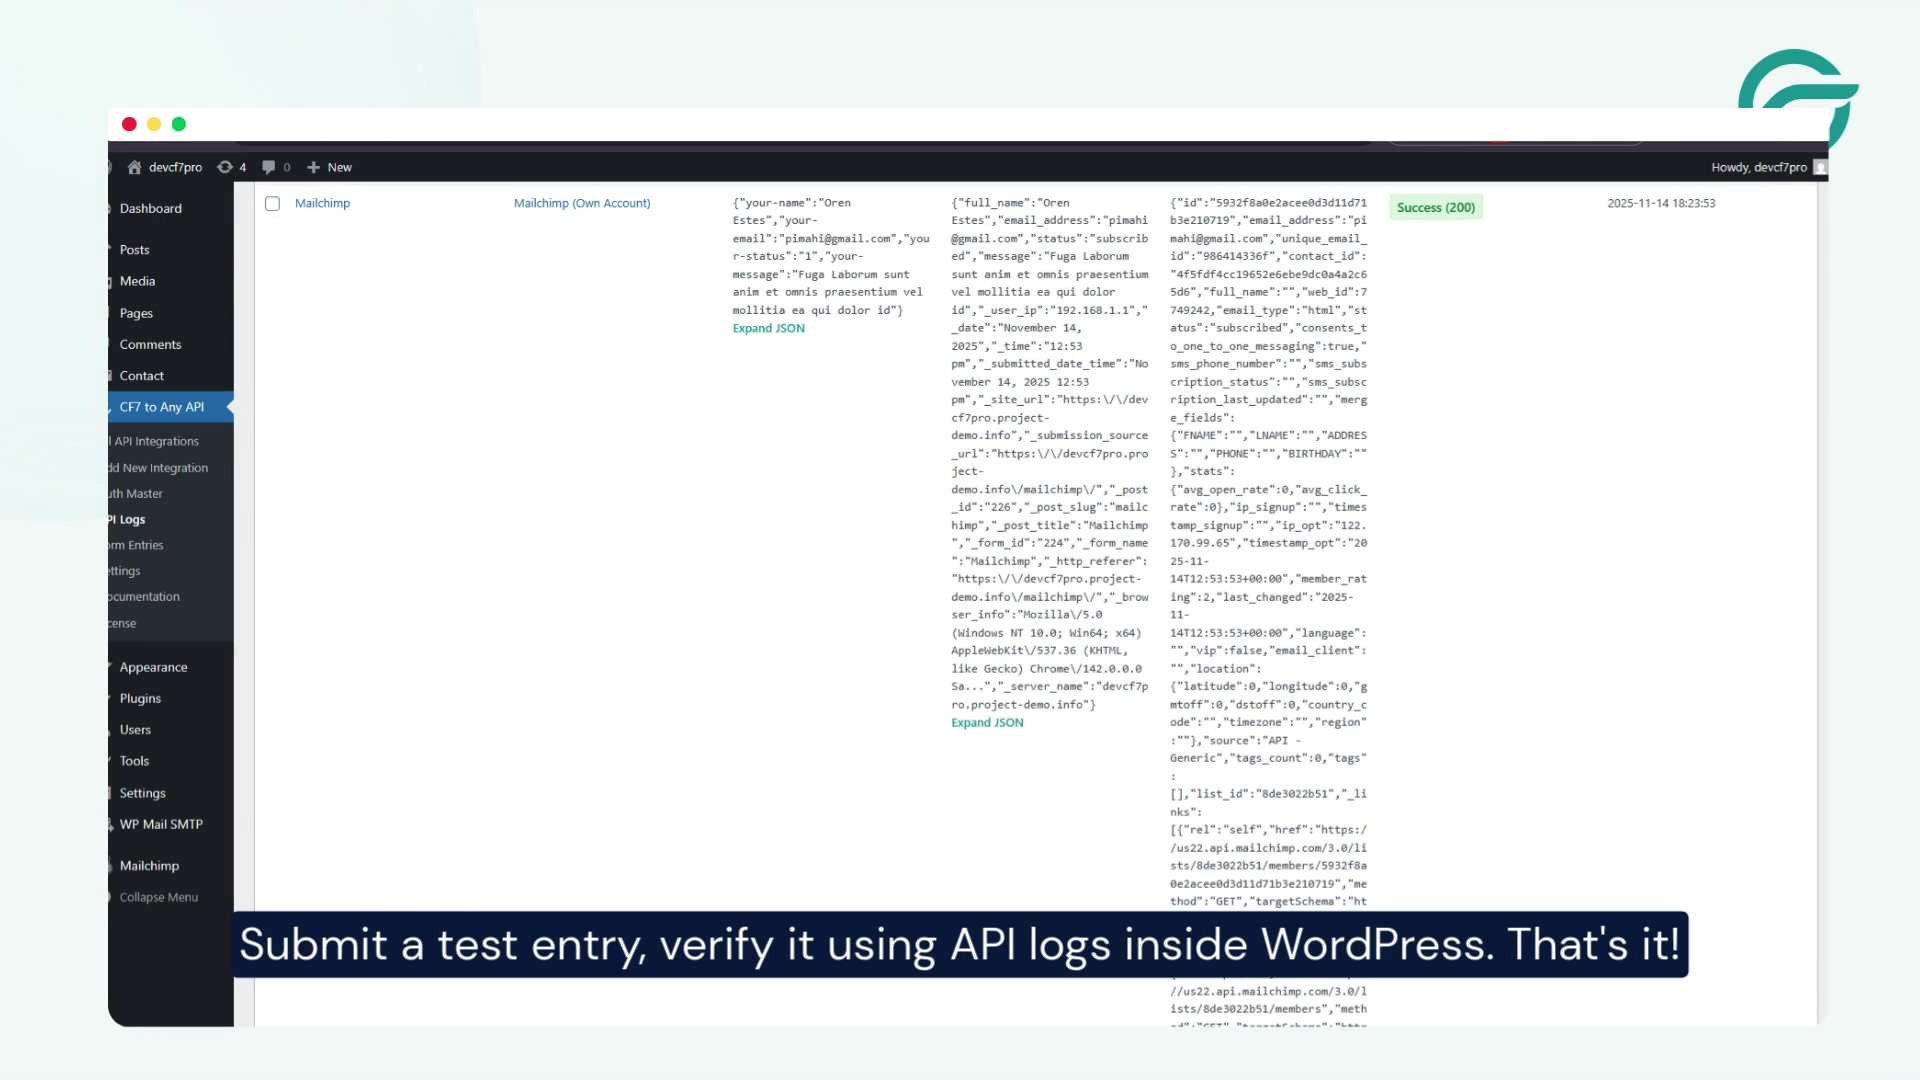
Submit a test entry using your contact form.
Then:
- Check the API logs inside WordPress
- Confirm that the data has been successfully sent to Mailchimp
- Verify the subscriber appears in your Mailchimp audience list
If everything looks good, your integration is complete.
Final Thoughts
Connecting Contact Form 7 to Mailchimp using an API streamlines your email marketing workflow and eliminates manual data entry. With proper field mapping and testing, you can ensure reliable subscriber syncing every time a form is submitted.
