

Managing leads efficiently starts with seamless form-to-CRM integration. In this guide, we’ll walk you through step-by-step instructions to connect Contact Form 7 with Pipeline CRM using the CF7 to Any API plugin, no custom coding required.
Let’s get started!
Watch the Full Setup in Action (Video Walkthrough)
Before diving into the step-by-step instructions, you can watch this short video to see the entire integration flow in real time.
The video walks through connecting Contact Form 7 with Pipeline CRM using CF7 to Any API, covering everything from adding the API endpoint to mapping fields and verifying test submissions.
If you prefer visual guidance or want to preview the setup before configuring it yourself, this walkthrough will help you understand what to expect at each stage.
Step 1: Create a Pipeline CRM Account
Visit the Pipeline CRM website and sign up for an account.
Once registered, log in to your dashboard and make sure your CRM workspace is ready to receive new leads.
Step 2: Access CF7 to Any API in WordPress
Install Plugin CF7 to Any API in WordPress
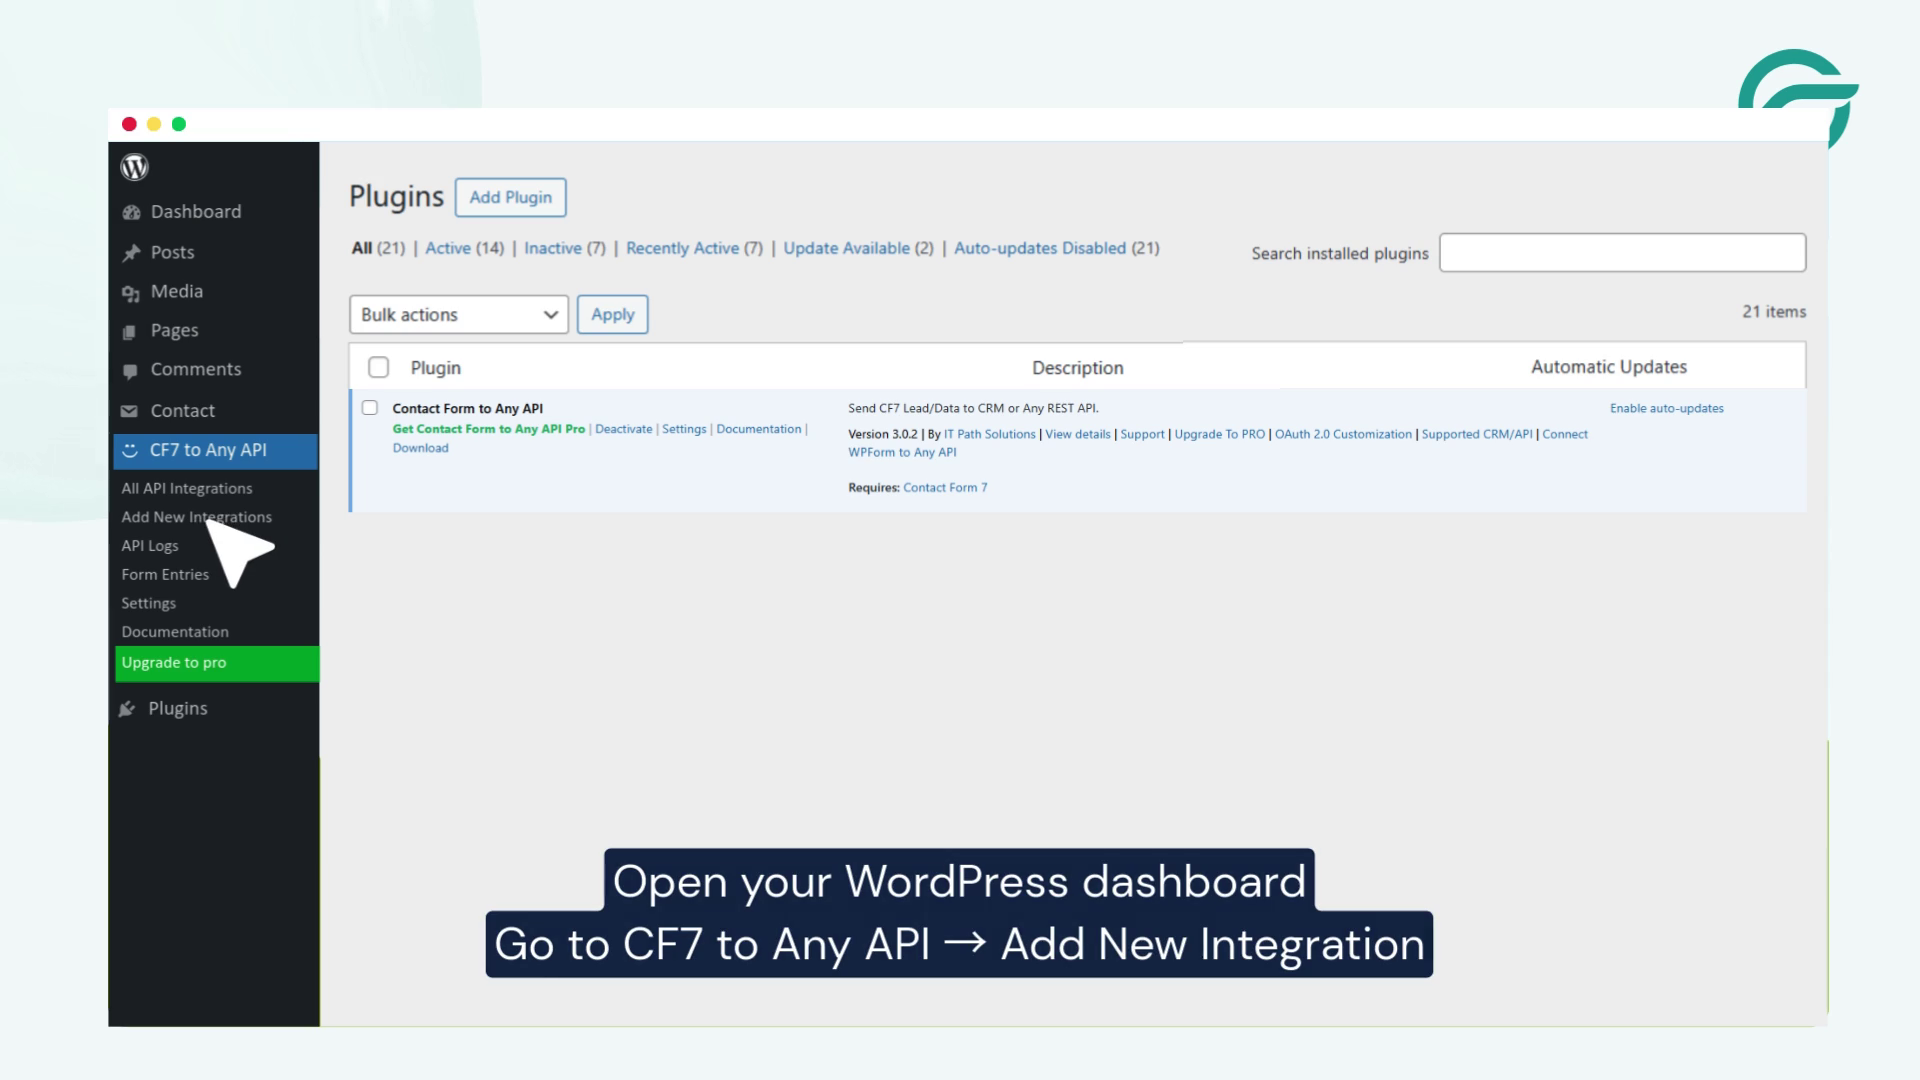
Log in to your WordPress dashboard.
From the left-hand menu, navigate to: CF7 to Any API → Add New Integration
This is where you’ll create the connection between your form and Pipeline CRM.
Step 3: Create a New Integration
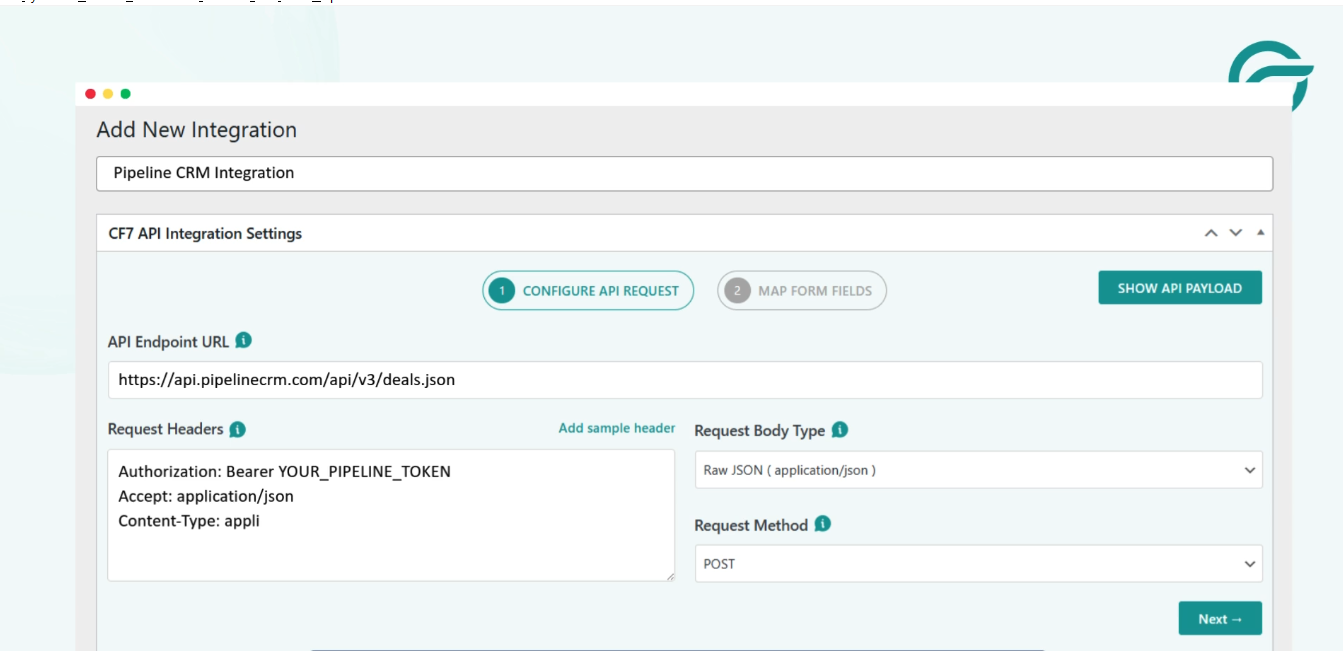
Give your integration a clear and recognizable title (for example: CF7 to Pipeline CRM).
Next, add the API Endpoint URL provided by Pipeline CRM. This endpoint tells WordPress exactly where to send your form data.
Step 4: Locate API Headers in Pipeline CRM
To authenticate requests, you’ll need an API key from Pipeline CRM.
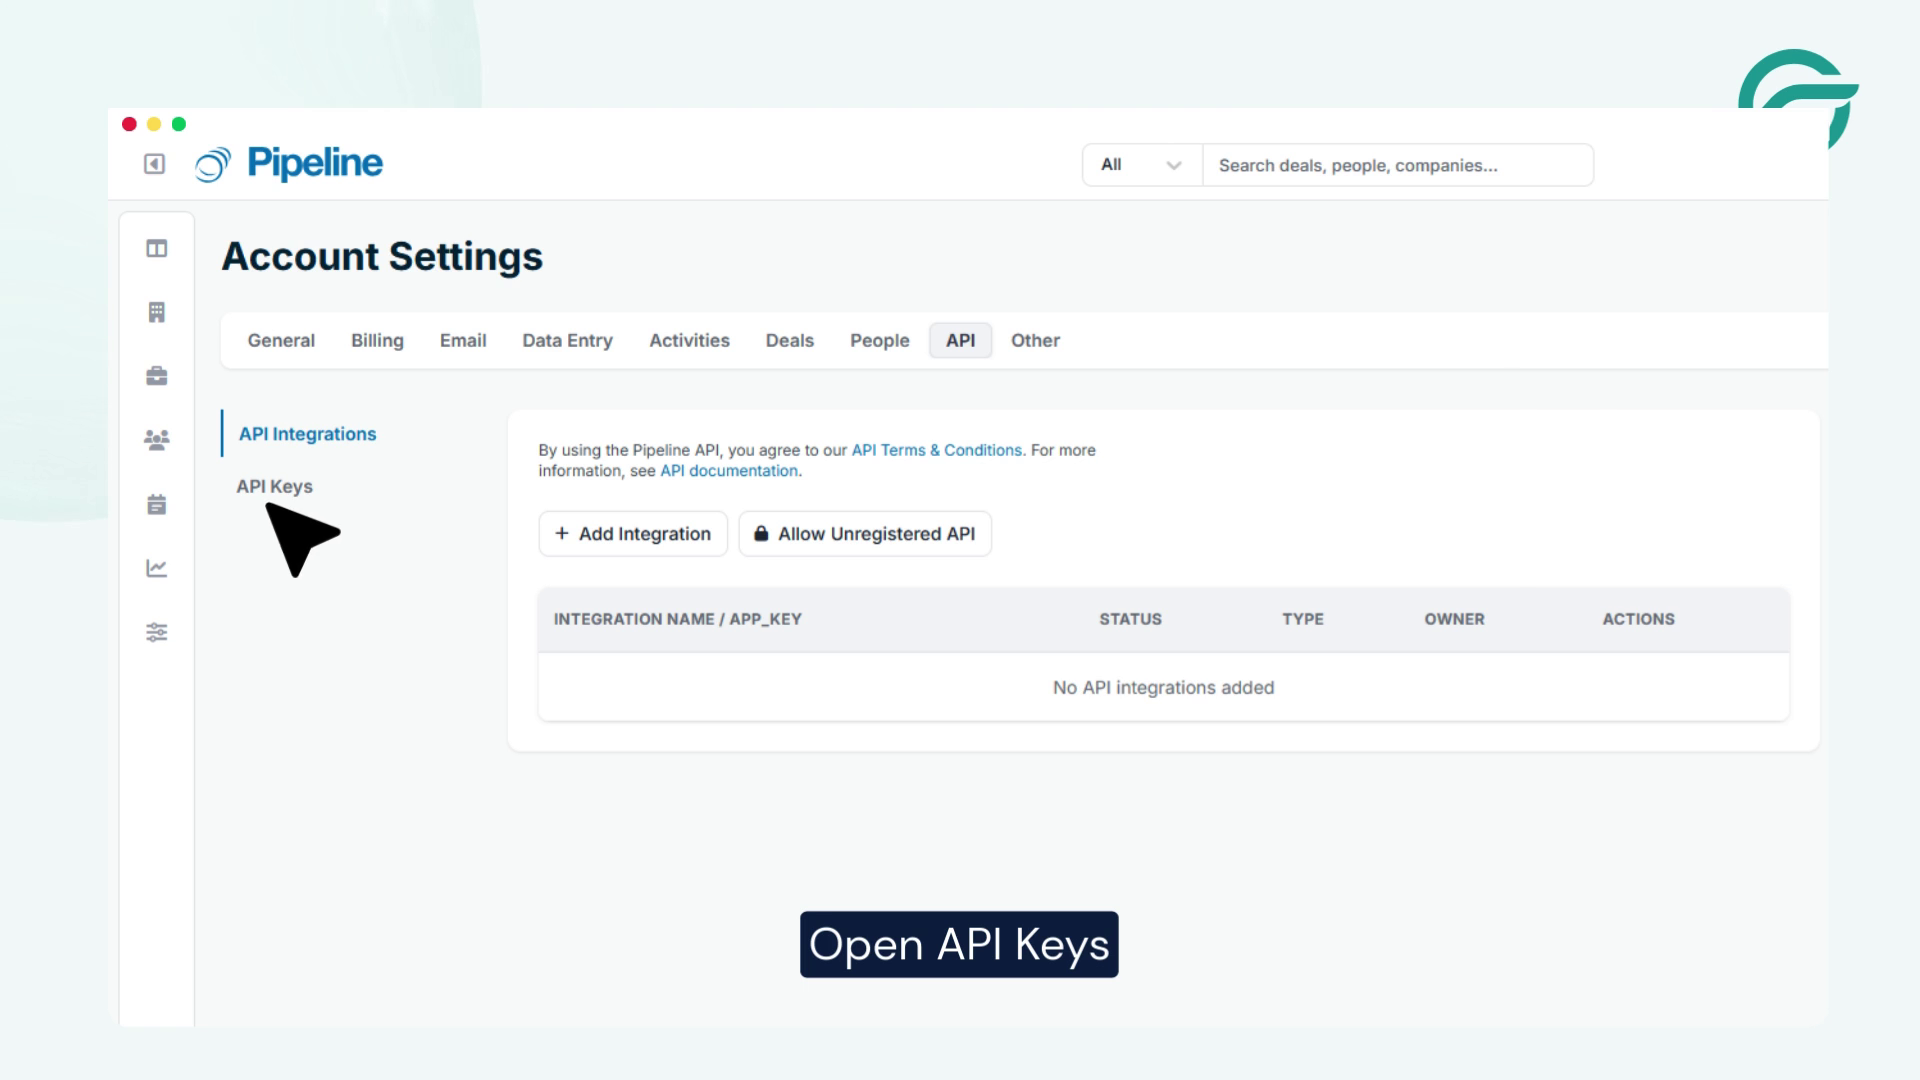
Inside Pipeline CRM:
- Go to the API section
- Open API Keys
This is where you’ll generate secure access credentials.
Step 5: Generate Your Pipeline CRM API Key
Enter your email address and enable API access. Pipeline CRM will generate a unique API key for your account.
Copy this key – you’ll need it in the next step.
Step 6: Add the API Key as a Bearer Token
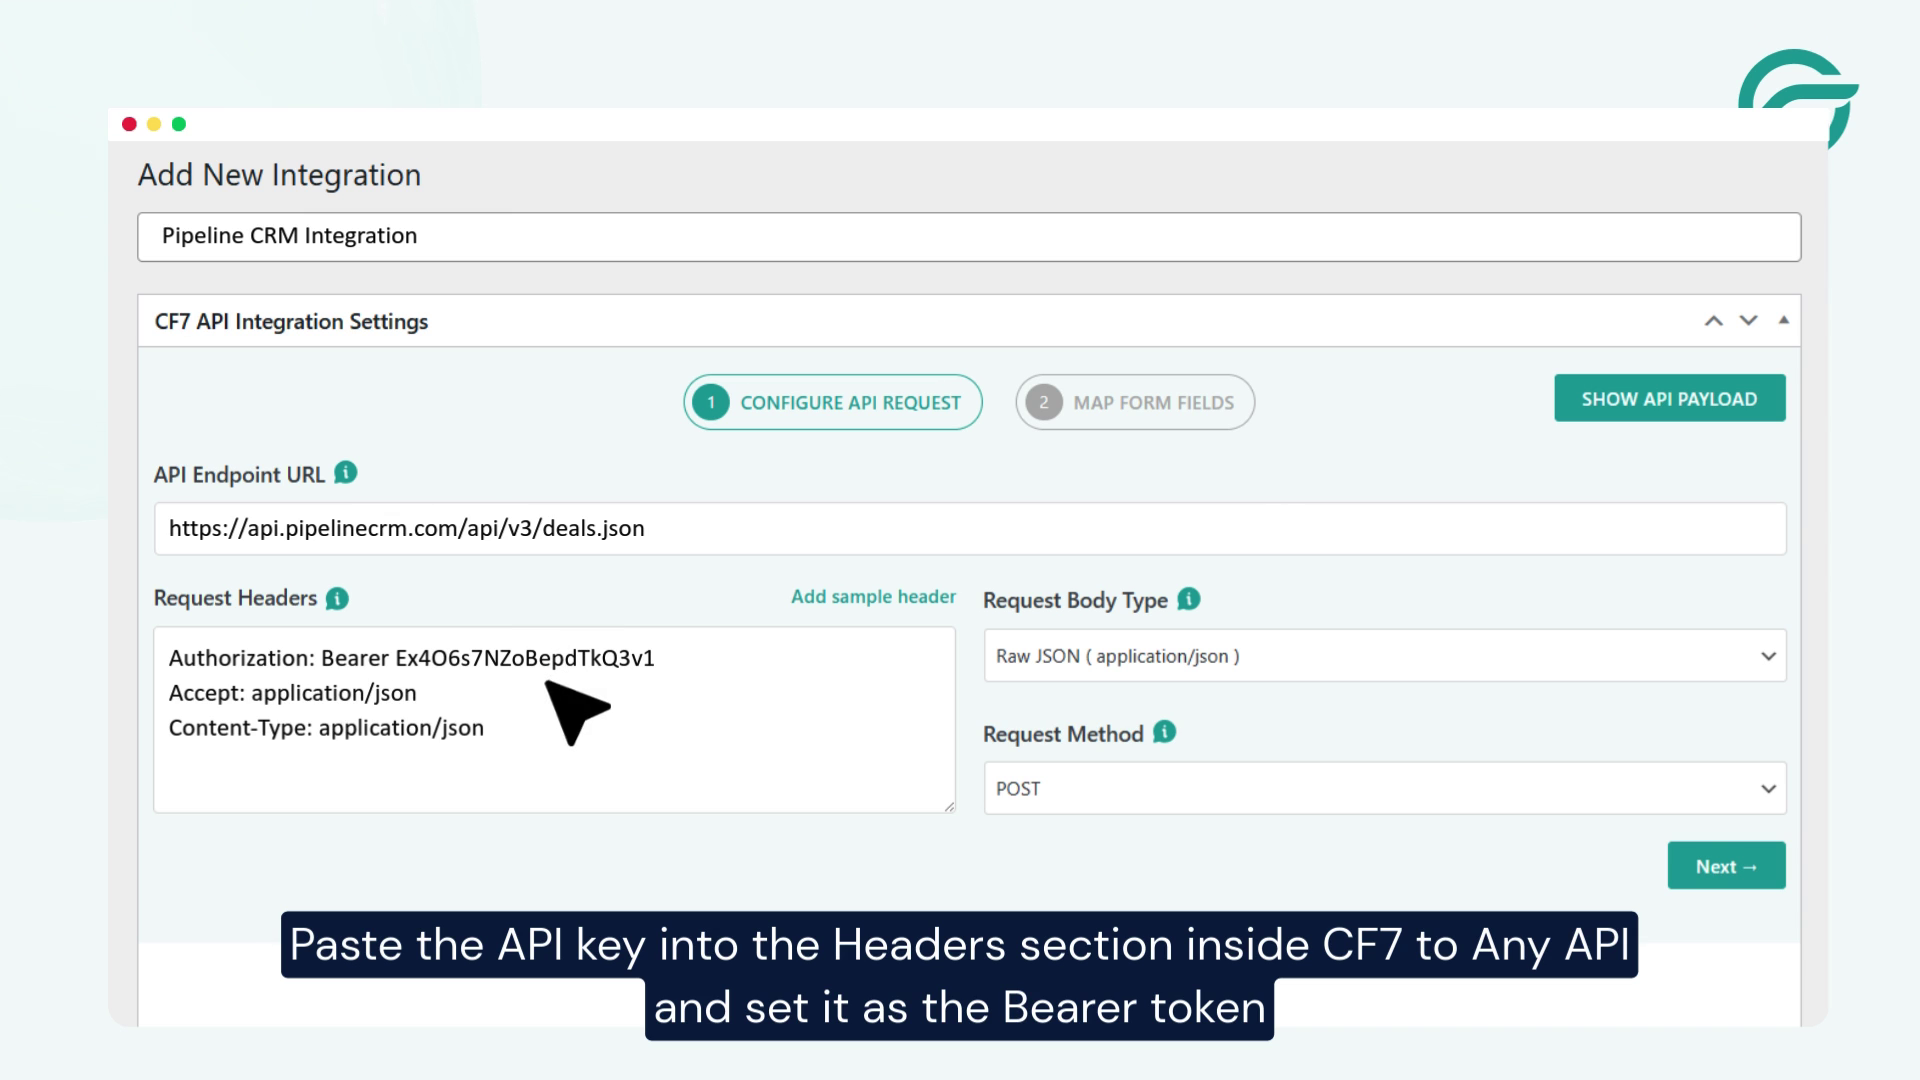
Return to your CF7 to Any API integration settings in WordPress.
In the Headers section:
- Paste the API key
- Set the authorization type as Bearer Token
This ensures secure communication between your website and Pipeline CRM.
Step 7: Select Your Contact Form 7 Form
Choose the Contact Form 7 form you want to connect with Pipeline CRM.
This could be a lead form, inquiry form or contact request form – any CF7 form works.
Step 8: Choose the Pipeline CRM Form
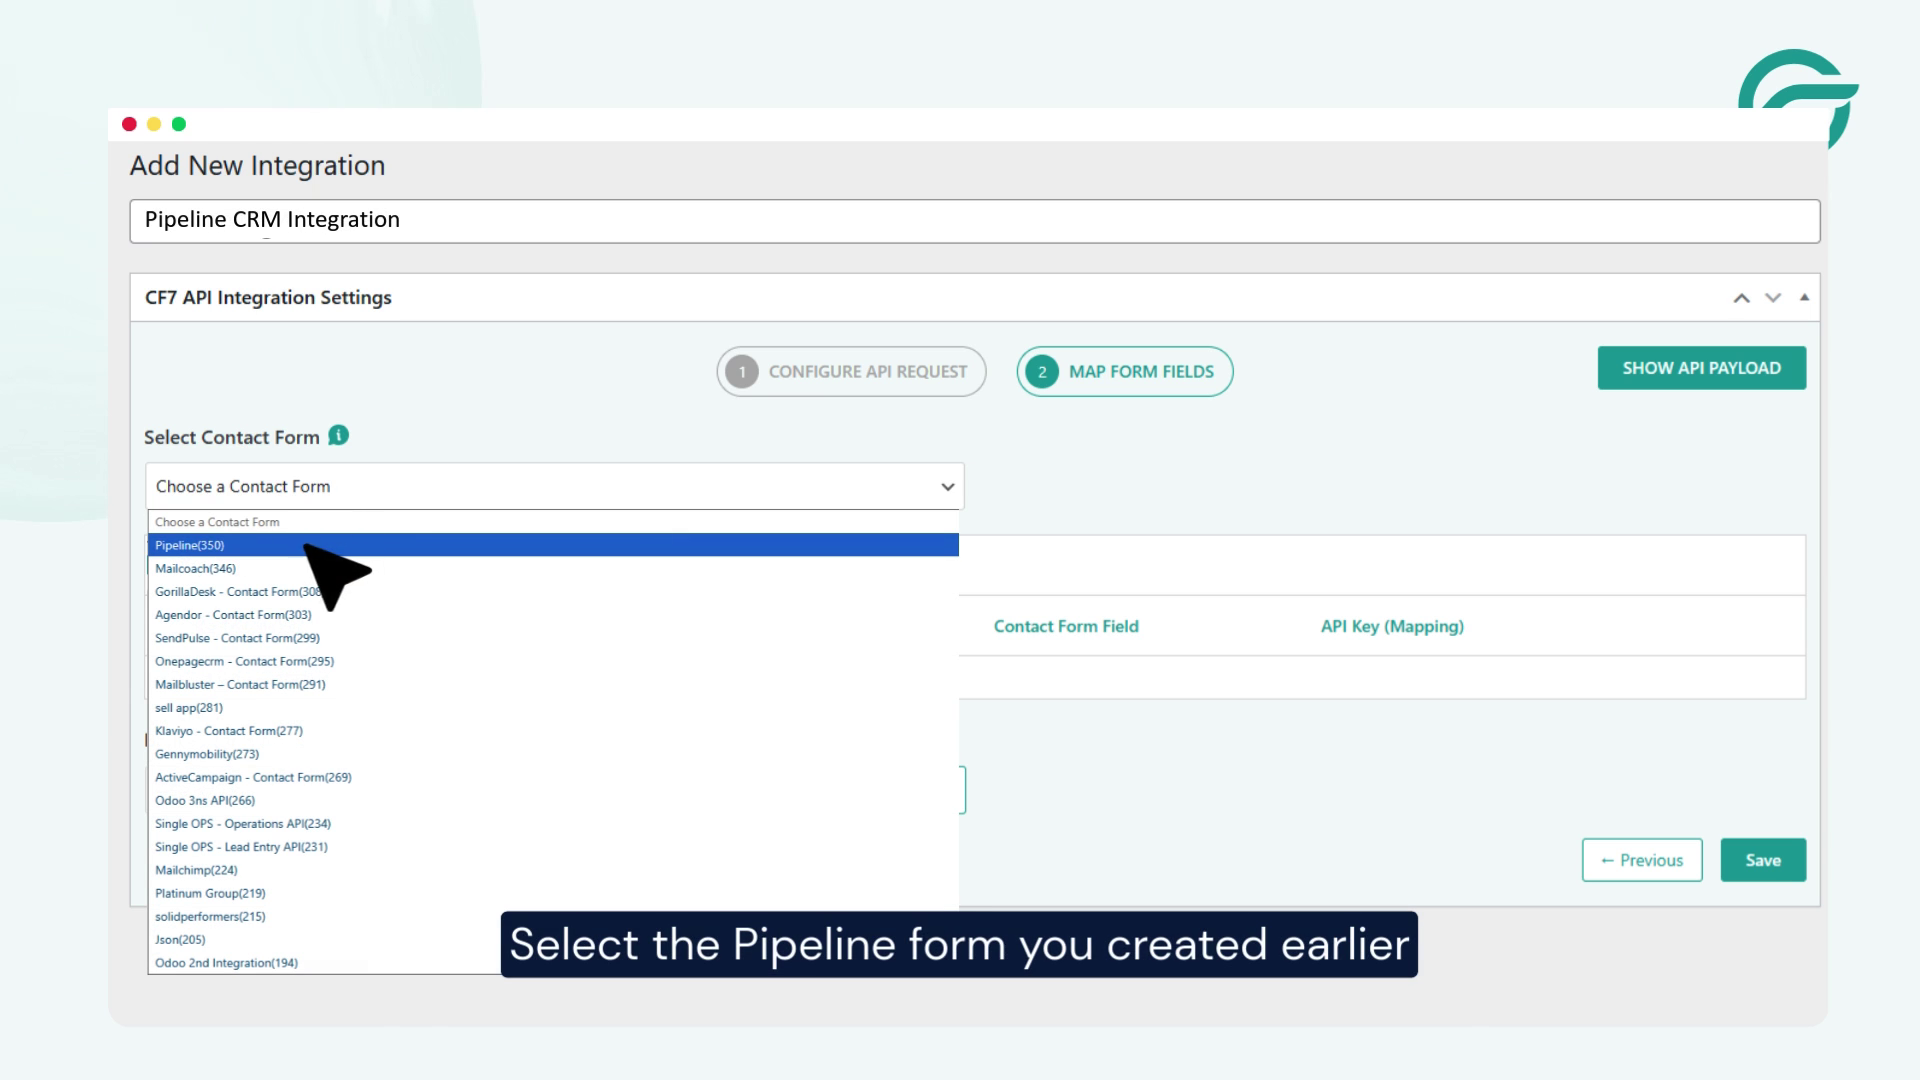
Select the Pipeline CRM form you created earlier.
This ensures submitted data lands in the correct pipeline or lead stage inside your CRM.
Step 9: Map Required API Fields
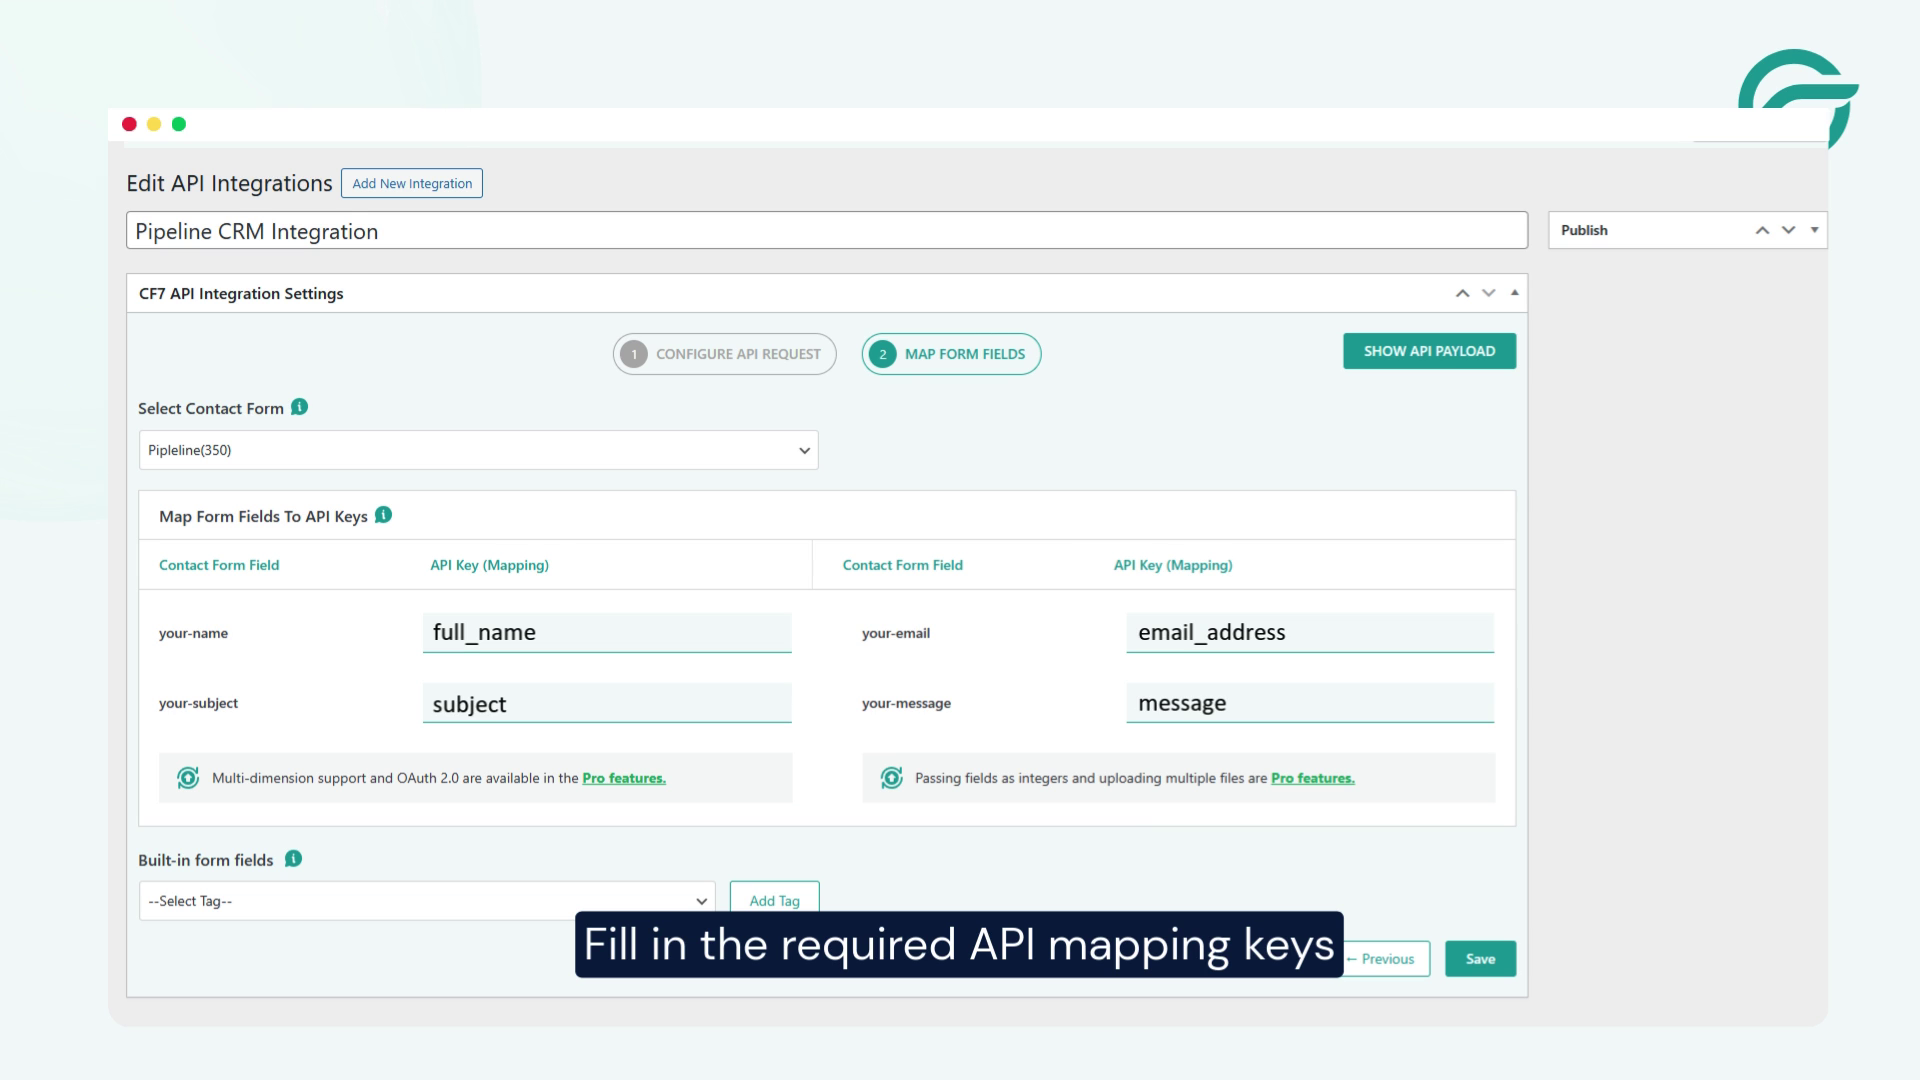
Now, map your Contact Form 7 fields to the corresponding Pipeline CRM API keys.
Make sure all required fields (such as name, email, or phone) are correctly matched to avoid data errors.
Step 10: Test and Verify the Integration
Submit a test entry through your Contact Form 7 form.
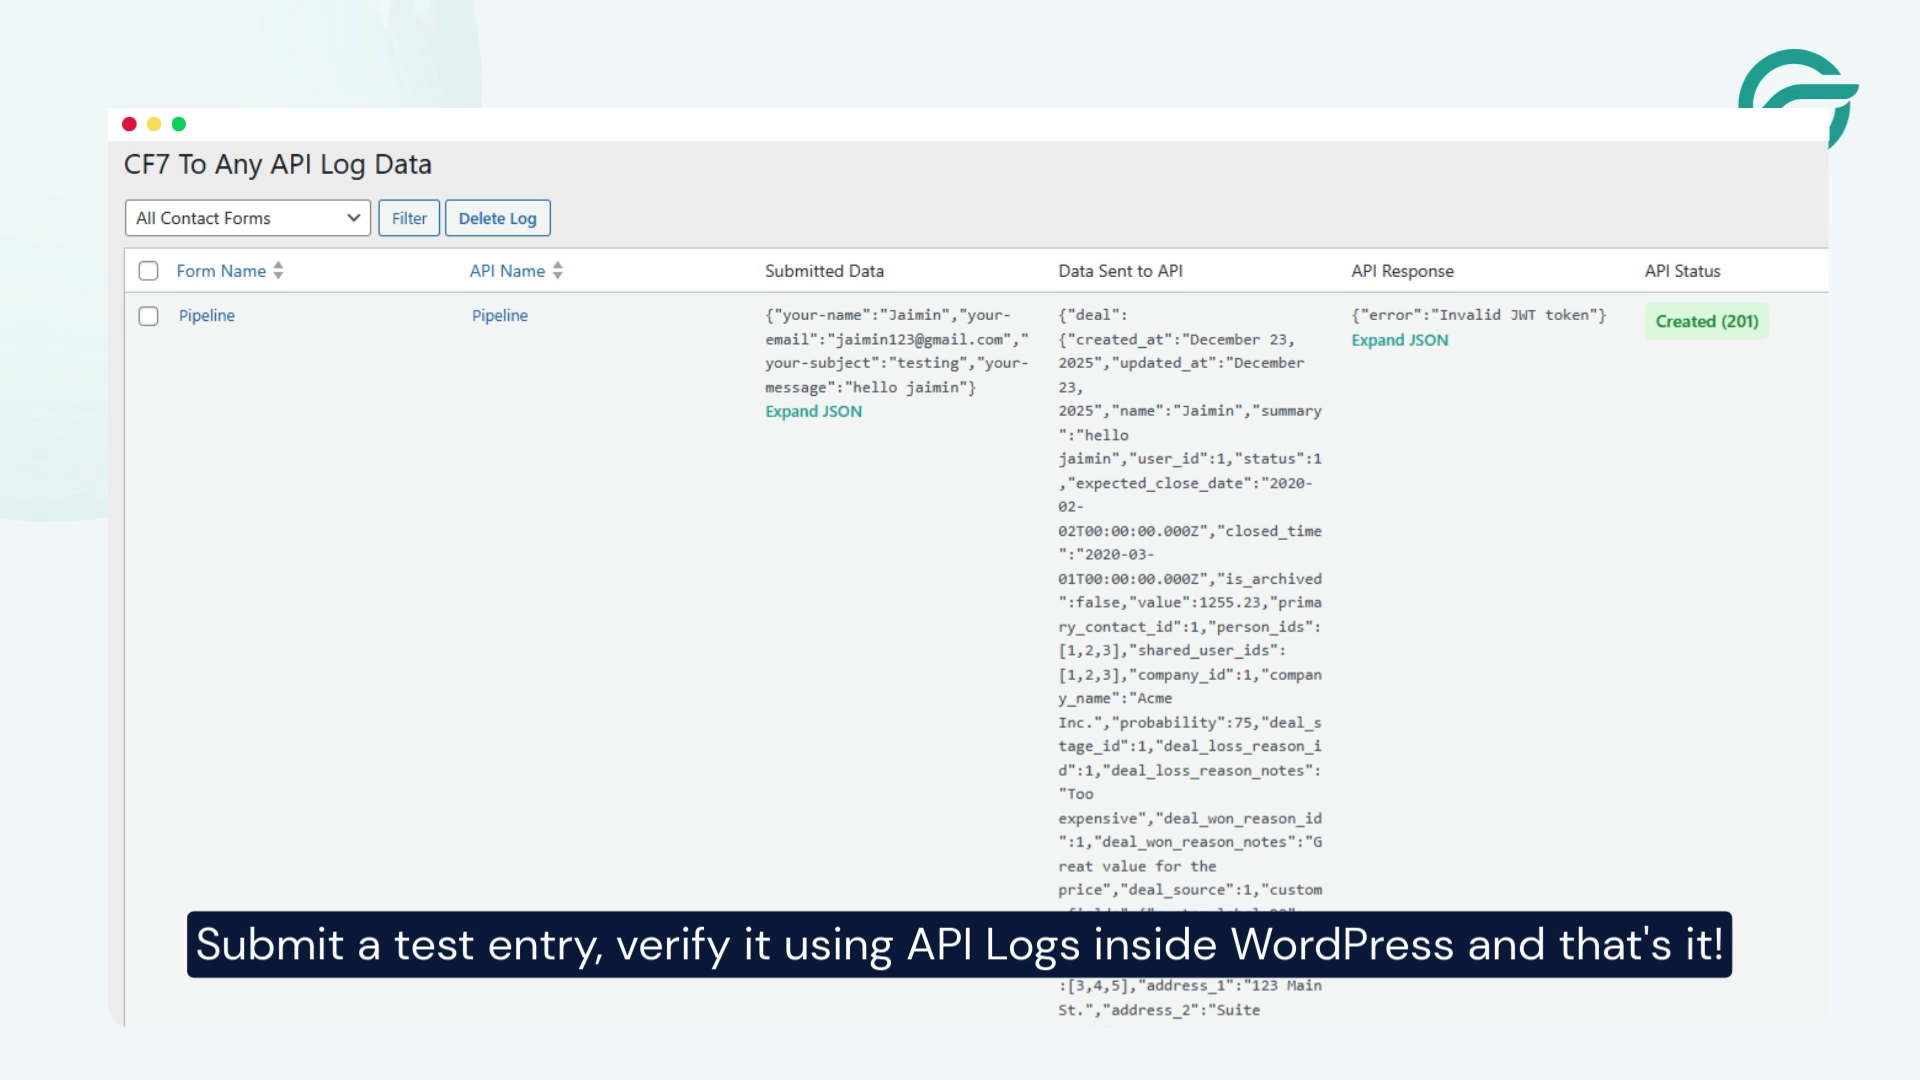
Then, check:
- API Logs inside WordPress
- Your Pipeline CRM dashboard
If the data appears correctly, your integration is complete.
Final Thoughts
With Contact Form 7 to Any API, connecting Contact Form 7 to Pipeline CRM is quick, secure and fully customizable. This setup helps you automate lead capture, reduce manual data entry and keep your sales pipeline organized.
If you need to scale later, the same approach works with hundreds of CRMs and marketing tools, making CF7 to Any API a future-proof solution.
